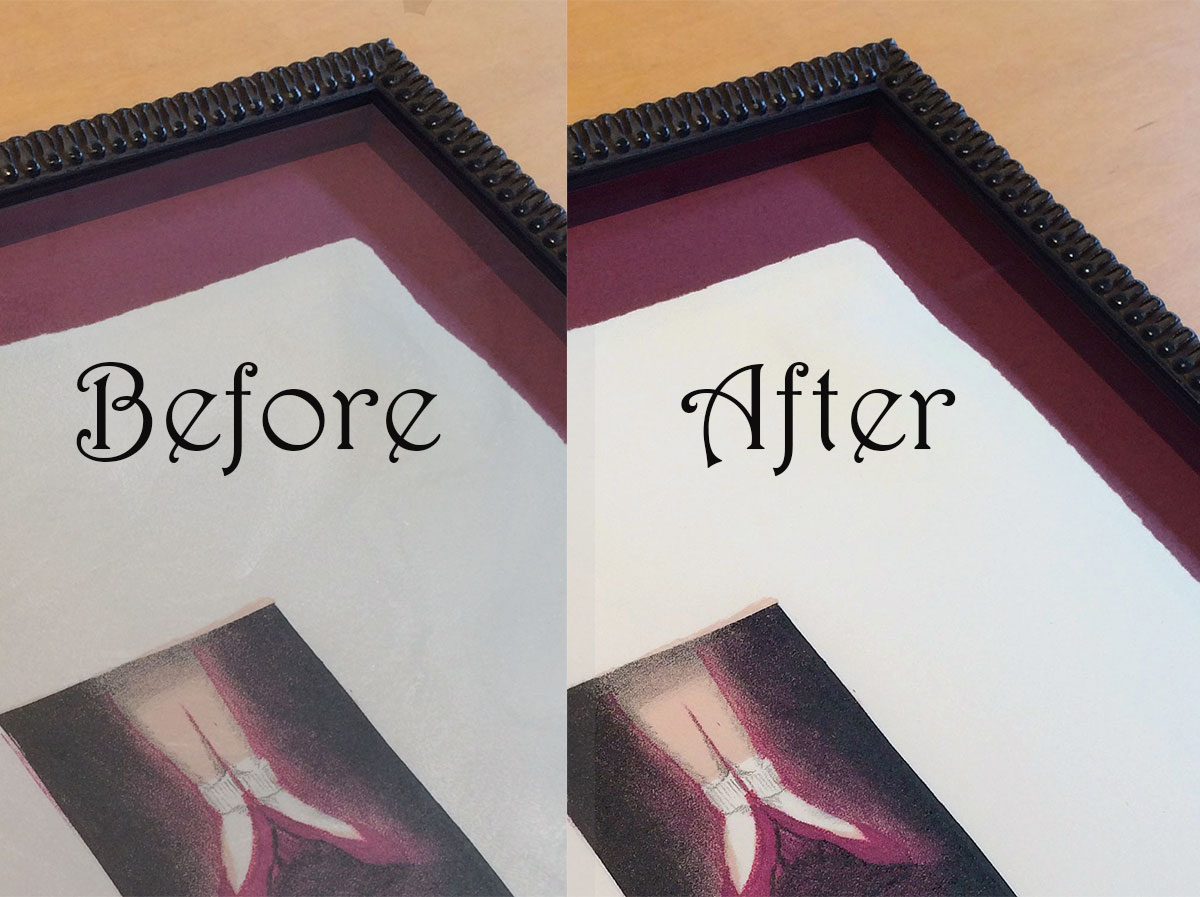
All picture frame glazing needs cleaning on the outside from time to time. When you have an enclosed environment even small amounts of out gassing can cause dull, cloudy or foggy glass over time on the inside too. Here are the best tools and tips to give your piece a fresh, new look..
 First let’s talk about glazing. What is “glazing”? Glazing is a term used to describe the clear protective surface used in framing, typically glass or acrylic. Glazing can come in a variety non reflective and UV protective finishes. Different types of glazing can be damaged by the wrong handling and cleaning products. So it’s important to know what you have before doing anything else.
Caring For Dull, Cloudy Or Foggy Glass
Step 1:
 Does your frame have glass or acrylic? Does it have any special coating or finishes?
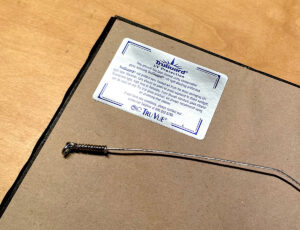
Look for a sticker on the back of the frame. Specialty glazing will often have a sticker letting you know what type of glazing was used. If you know what type of glazing was use, great, proceed to step 2. If not, contact the framer who did the work and ask them. Many framers keep records of their client’s work and can answer that with a simple phone call or email. Additionally you can bring your piece to any local frame shop and ask them to help determine what type of glazing was used. Most framers can identify the glazing by sight and touch/sound.
Step 2:
Is the dull, cloudy or foggy issue on the inside or outside of the glazing?
To know if it’s on the inside or outside of the glazing take a soft cloth, like an old t-shirt, and very gently wipe a small area. Did you make a bit of a clean spot? If you did, your glazing may only need cleaning on the outside and you can proceed to step 3. Still have dull, cloudy or foggy glass? Your frame will need to be taken apart and cleaned on both sides. If you are able to safely take the frame apart yourself, proceed to step 3. If you cannot or prefer not to unassembled your frame contact your framer. Most frames will charge a simple unfit & refit fee and take care of all the cleaning, dust cover & wire backing, if needed.
Step 3:
You’ll need a soft clean non abrasive cloth and the appropriate cleaner.
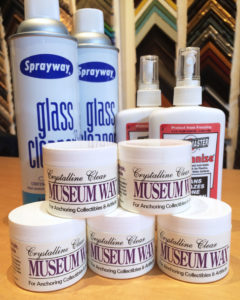 Regular Non-Coated Glass: Use any glass cleaner.
- Coated Glass: Best to use a cleaner that is free from alkaline compounds such as ammonia, sodium or postassium. You can create your own mild glass cleaner using a mix of clear vinegar and distilled water. I sell cans of Sprayway, the type of cleaner I prefer, in our shop.
- Acrylic: Only use specially formulated acrylic cleaners, such as Brillianize. You can create your own mild acrylic cleaner using a mix of mild dish soap and luke warm water. Brillianize has the added benefit of reducing static electricity that is created when cleaning acrylic. Static electricity can damage fragile art surfaces, like pastels and ultra fragile papers by drawing loose bits to the acrylic. I sell Brillianize in our shop and find it is great for other plastic surface cleaning around the house, as well. For more heavy duty dirt and film on acrylic, from such things as grease, oil or tar you’ll need to use a good grade of hexane, aliphatic naphtha or kerosene. These solvents can be obtained at a paint or hardware store and should only be used in accordance with manufacturers’ recommendations. Clean any oily film left behind by solvents immediately by washing. Do not use window cleaners, kitchen scouring compounds or solvents such as acetone, gasoline, benzene, carbon tetrachloride or lacquer thinner.
Step 4:
Clean your glazing
Using the appropriate cleaner, clean your glazing. I recommend spraying the cleaner on the cloth, not directly on the glass. For non reflective coated glazings do minimal rubbing and cleaning. These can be fussy surfaces that can look worse if you go in all willy-nilly 😉 Many glazings with interior UV protective coatings can scratch very easily. I suggest using an antistatic brush on glass glazings. Acrylic is very prone to scratches. I recommend compressed air for removing dust first. Once you’ve completed your glass cleaning you are ready to reassemble (if needed) and rehang your art work!
In most cases, using the right cleaner for your glazing along with the tips in step 4 will give your framing a new, fresh, clean look.
If you still feel like you aren’t getting the clarity and look you want from the cleaning, bring your framed piece into your local framer for inspection and possible glazing replacement.
Wishing you many years enjoyment from your custom framing,
Jennifer Secrist Goran
Owner & Certified Picture Framer, JSG Exquisite Custom Framing